Amazon Prime – Beitrag hat sich erhöht – kündigen? Und wenn ja, wie?
Die Mitgliedschaft bei Amazon Prime ist an sich eine nette Sache. Für einen Jahresbeitrag von 29.- Euro erhält man jede Bestellung – die direkt von Amazon versendet wird – versandkostenfrei. Und dies meist auch schon am nächsten Tag.
Zusätzlich kann man viele, jedoch natürlich nicht alle, Amazon Kindle Bücher kostenlos ausleihen.
Was hat sich jetzt geändert ?
Zunächst einmal steigt der Jahresbeitrag der Amazon Prime Mitgliedschaft von 29.- auf 49.- Euro im Jahr.
The most interesting Parts are items 252147177192 and 262476223511
wich allow perfect clone of actual connection.
Here the basic instruction:
Note: (link to perfect Displays will follow)
Example pictore of LCD Screen with connection:
The LED Backlight is very long lasting and not much more expensive than simple EL-Foil replacement.
It needs 5 Volt DC Power for the LED-Backlight, which is common and hasslefree, some different displays need only 3,5 Volt and you have to add som resistors.
But here you can use e.g. 5Volts of Floppy Disk Power of your Synth and have no Problem with calculating resistors.
First Step: Please read all the information here and in the links on bottom, ist no bad idea to google for some newer info or videos
as linked here. Thean you will see what addition connectors and cable you will need for YOUR synth.
Please: avoid any electrical statics when touching the display
Disclaimer: Modding and soldering at your own risk, I can not be held responsible for any damage!
As you know: Unplug the device first – HIGH VOLTAGE inside!
Connection to synth:
Depending on time and soldering skills you may re-use your old connector cable from the old display,
but I recommend to purchase a new one. there are different types, with small head connectors or big ones you can plug in.
Which ones depends on how much space is behind the display, and as mentioned below on some models you need right angled connectors.
Please look carefully how your old connector cable is build.
See ordering example from ebay for IDC 20 Connectors and cables in the links( seller Just-Honest) below.
Attention!
When soldering IDC to Display on some synths you have to leave 21+22 pins open (see details in the links)!
21+22 are only anode and cathode (+/-) for the LED Backlight.
Some Synths , e.g. K5000 need to leave some pins in the middle unconnected. In that case you can easily
solder your custom socket with simple Pin Headers (from ebay , for example).
You also have on the other side of the display 2 soldering points named „A“ + „K“ to feed
the backlight with 5 Volt.
See example picture here: (above the new display, below the old)
http://www.tellun.com/wavestation/WS_old_and_new.jpg
WARNING!!!!!! !!!!!!!DO NOT: DO NOT feed the LED backlight of the new display with the power for the EL-Light Foil of the old Display!!!!
This is high voltage(!), coming from a small transformator or „Inverter“ which converts low voltage (often 5Volts) to high power.
Its best to remove or deactivate this small transformator /inverter , but you can use the Voltage coming IN the transformator to feed the LED backlight of the new display
if this is 5 Volts DC.
Note: On some synths you can easy get + 5 Volts from the source that powers the Floppy Drive.
The transformator for the EL-Foil Power is now obsolete, and it often was the reason for that whining display noise.
The usual case you already have searched the internet for some replacement solution,
but here I will provide you with some links for information and How-to´s:
The most interesting Parts are items 252147177192 and 262476223511
Need Connector with left-out pins?
Just search ebay for „IDC20 PCB“, or „Pin Header“ if you want to build your own socket.
Here some example:
http://www.ebay.de/sch/m.html?_odkw=&_ssn=just-honest&_armrs=1&_osacat=0&_from=R40&_trksid=p2046732.m570.l1313.TR12.TRC2.A0.H0.Xidc+20.TRS0&_nkw=idc+20&_sacat=0
http://www.ebay.de/itm/Stiftleisten-pinheader-2-54-mm-in-drei-Fraben-40pin-male-single-row-/322346322811?var=&hash=item4b0d568b7b:m:mCNz68JriMJGLgNm-4ppCNg
Connection on your Synth is from the side?
Look after this in ebay „20 way right angled header connector“.
Or just choose „abgewinkelt“ from JUST-HONEST
Some links for installation of the display- if one isnt working or you find newer, please mail me in the comments – Thank you!
Note: There are also many links on Google and vids on youtube which show only the replacemet of the EL-Foil,
but you will change the whole display, BUT: Here you may find some usefull hints how to open and re-assembling your device.
It´s never a bad idea to take photos when disassembling, also easyier when looking for similar parts (theconnectors) on ebay.
http://www.mpc-forums.com/viewtopic.php?f=27&t=97249
You may need to reinstall your OS to format the new Display.
Please note: If screen is blank after installing new display, you may have to adjust the contrast of the screen. (Hold Shift and Move Jog wheel) Kawai K5000
remove transistor Q2 on power board to disable EL-Foil Transformator
http://www.vintagesynth.com/forum/viewtopic.php?f=1&t=74894 Korg
http://www.tellun.com/wavestation/wavestation.html
http://jaryic.livejournal.com/11778.html
Yamaha
Please note: On some models the Display connector is coming from the side, so you will need to make a socket
with a 20 pin right angled pcb header connector, see pictures in the links or on ebay or google.
http://www.xfactory-librarians.co.uk/Downloads/Yamaha_TG77_Display_Upgrade.pdf
http://www.xfactory-librarians.co.uk/Downloads/Yamaha_SY77_Display_Upgrade.pdf
http://www.javaworks.de/page13/page57/page57.html
http://www.yamahaforums.co.uk/forum/viewtopic.php?t=5973
http://www.yamahaforums.co.uk/forum/viewtopic.php?t=4592&start=90
This one is especially for SY99, but most steps of the SY77 are identical, so you should read them too.
http://www.yamahaforums.co.uk/forum/viewtopic.php?t=4846
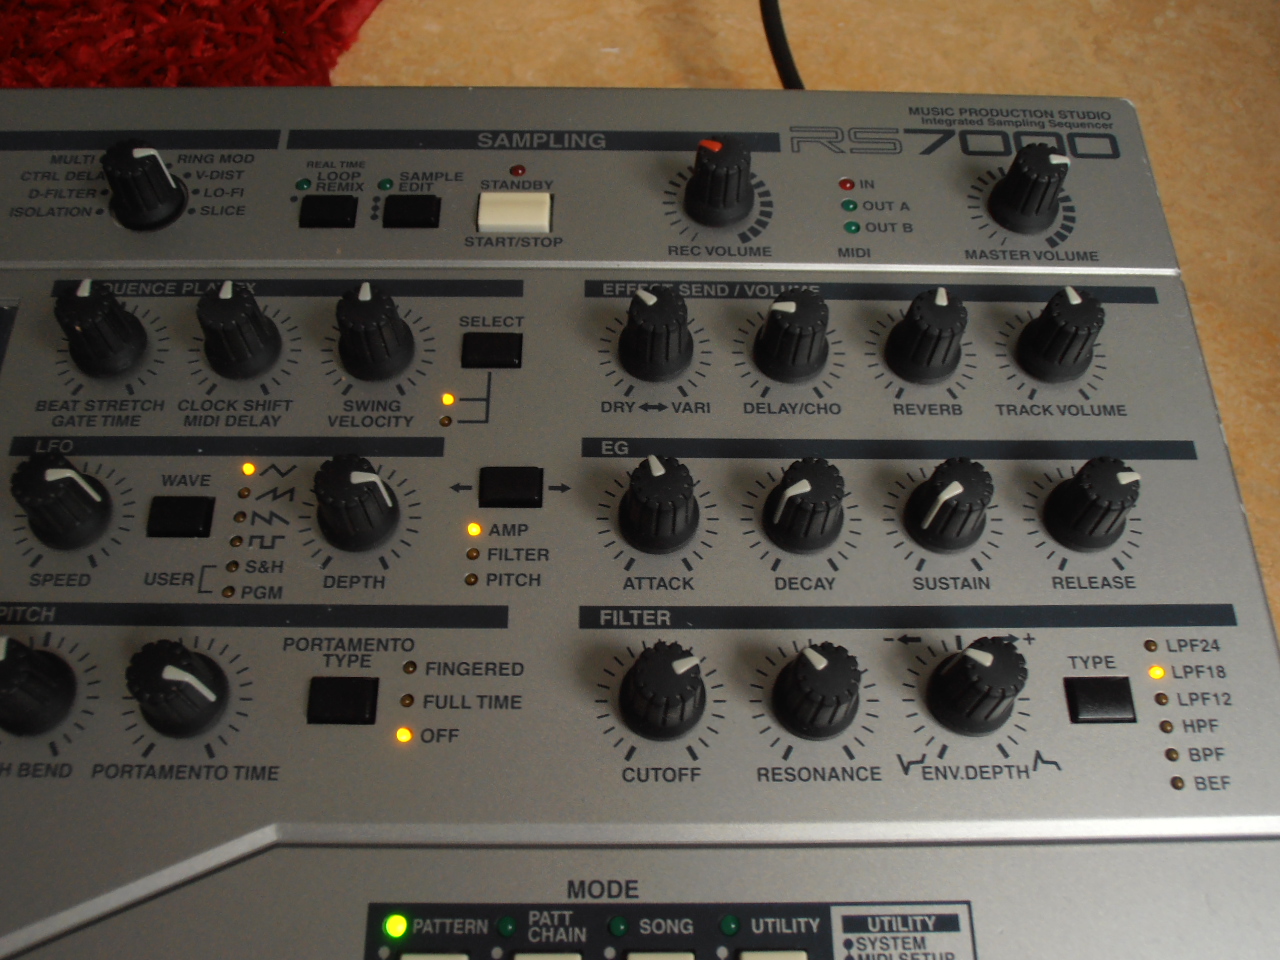
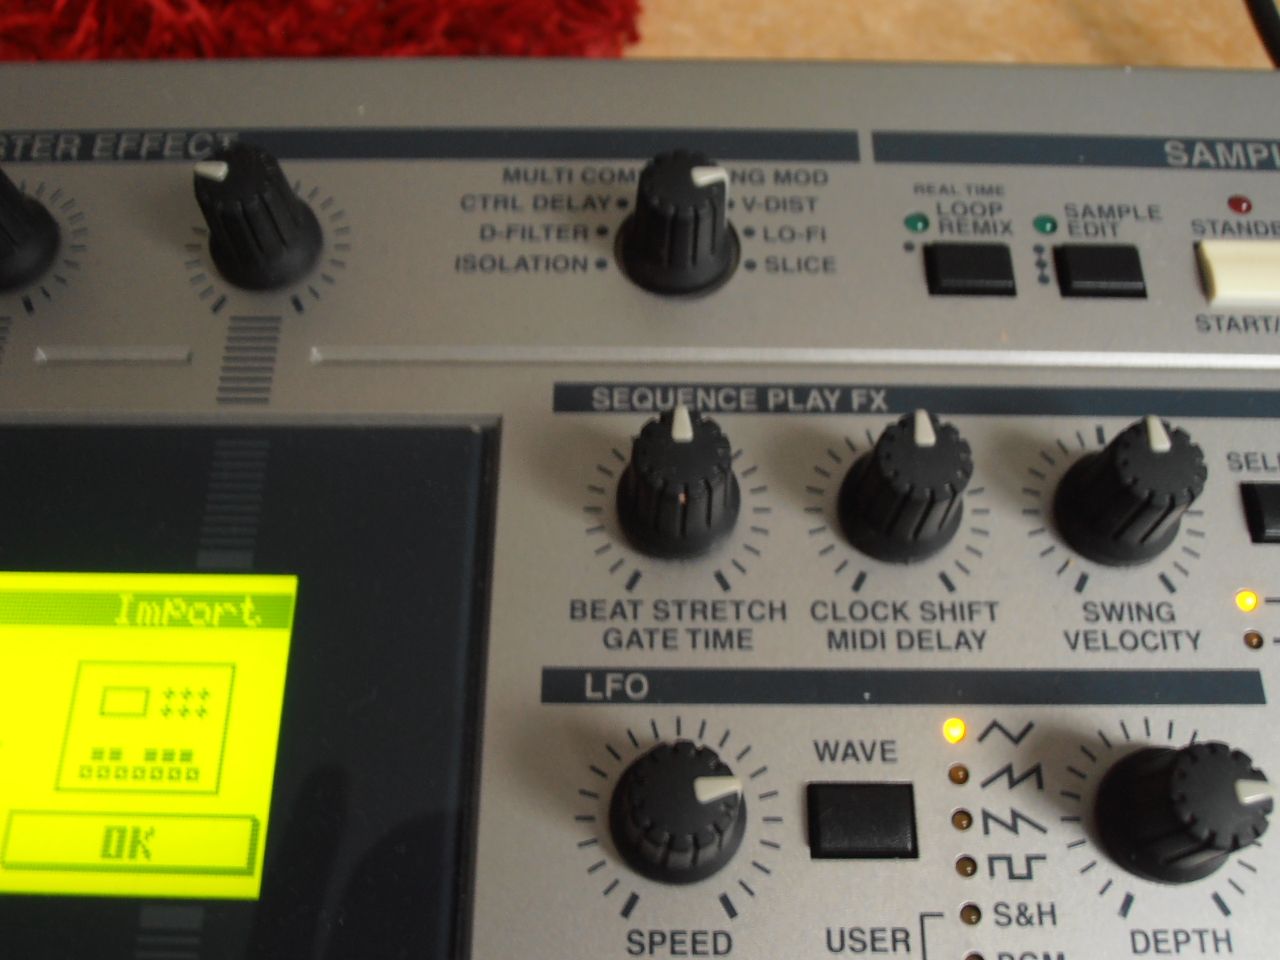
Last year I got a Yamaha RS7000 Music Production Studio with very weak knobs – some encoders and most of them are pots /potentiometers. The repair of the knobs of a Yamaha RS 7000 is a very difficult thing and hard work, you have to dis-assemble the whole machine from the bottom to the front, pulling the PCB´s carefully out and than de- and re- solder the pots or encoders.
By the way, finding knob replacements is very hard too, you have to do some deep web search to find equivalent replacemnt potentiometers and encoders.
One simple trick / tip to let your Yamah RS 7000 knobs live longer
How do the knobs / pots /potentiometers live longer?
There is one simple hint I could not find in the manual so far, maybe its very hidden.
You just have to hold [SHIFT] while turning a knob to move in values of +/-10
So you can just „fly“ through the values with warp speed, without turning too much.
The complete list of Yamaha RS7000 Tips Tricks Tutorial Guide
Big thanks for this very usefull list of hints and tricks go to Phil Clendennin, aka „The Bad Mister“. Phil is a Yamaha professional.
Bad Mister’s RS7000 Tips:
Shortcuts:
Press [SHIFT]+[Fx] (Function buttons 1-4) to activate the numeric keypad via Sub-mode buttons – the numbers flash meaning you can enter data via buttons, press [ENTER] or [DO] to execute;
[OCT DOWN]+[OCT UP] = return to normal octave;
[SHIFT]+[UTILITY] to see available sequencer/sampler memory.
[SHIFT]+[MASTER] to return Master Effects to their default settings
Factory Reset: Hold [OCT DOWN]+[OCT UP]+[STORE] on power up
Autoload: Hold TRACK button 1…9, on power up to activate Autoloads 1-9. You create the auto loads by, literally, naming the file “autold1”, “autold2”, “autold3”, etc. Once executed the unit will automatically load the file every time, until you reprogram it to look elsewhere. Holding track 10 on power up will cancel any programmed auto load. You can also place an auto load file on a SCSI drive. This makes it easy to pick up where you left off if you ever have to stop mid-session. Simply create an Autoload file in a folder named for the project in question, power up and you are back where you left off.
Hold [SHIFT] while turning a knob to move in values of +/-10
Hold [TRACK SELECT]+[ALL] while changing a function to affect all tracks simultaneously
Hold [TRACK SELECT]+[1-8] while changing a function to affect the first 8 tracks
Hold [TRACK SELECT]+[9-16] while changing a function to affect tracks 9 through 16
Test Routine: [PATTERN]+[PATTERN CHAIN]+[UTILITY] on power up
Update Routine: [REC]+[STOP] on power up
If you find this usefull and like to share, just copy and paste this link:
Create your own custom drum kits with the Yamaha RS7000
RS7000 Custom Kits Tips:
You will naturally develop your own favorite drum sounds. The RS7000 will let you assemble and manage your own custom kits. Custom kits will be made from user samples and can be best assembled in a SAMPLE COMMON Program location. Individual samples that have been created in a Sample Local Program can be copied to a Sample Common program. The advantage is that Common programs can be accessed from all Patterns and Songs – not just the one they were sampled into. There are several ways in which you can get samples into a Sample Common Program: As mentioned they can be copied. Sample locations are number 001 through 128 and C001 through C128, where C is Common. Samples can also be imported directly into Sample Common programs (if you select the location in the mixer prior to importing). Even samples that have been Sliced into segments can individually be copied to a location within a Common Program Kit. The Sample Common Program can be named and stored as part of an ALL, a PATTERN or a SONG data file (.R2A, .R2P, or .R2S) and it can be loaded separately if you select LOAD, then select the “SMPL” as your load type and look in the “Common_Samples” folder.
The RS automatically keeps track of “Common_Samples”, “Pattern_Samples” and “Song_Samples” and lets you extract individual samples from within ALL, PATTERN, and/or SONG data files types. When a Pattern or Song has a phrase that points to a Sample Common Program – the RS will automatically associate the samples used with the Pattern they are used in. This way if you load the Pattern – you will load the samples.
The best way to archive your data is in ALL data files – because it is the most complete. It also lets you recover any portion of the data, for example, you can load a single Pattern from an ALL data file that contains 64 Patterns. You can load a single Song from an All data file that contains 20 Songs. You can recall any Local Sample (sample used within a Pattern or Song) or any Common Sample program from an ALL data file. Rather than save each Pattern individually to SmartMedia card – save an ALL file – this way it will not duplicate the COMMON samples for each individual Pattern save.
If you find this usefull and like to share, just copy and paste this link:
Vielschreiber am PC und Programmierer haben in Bezug auf die richtige PC Tastatur oft die gleichen Ansprüche.
Der Autor dieser Zeilen selbst hat schon zig Tastaturen unter den Fingern gehabt, und ist nach langer Suche endlich fündig geworden.
Meine Ansprüche an eine Tastatur, welche sich zum Schreiben und Programmieren gleichermaßen bestens eignet:
wertige Verarbeitung
nicht klapprig, weder klapprige Tasten noch klapprige Verarbeitung
relaltiv schwer sollte sie vom Gesamtgewicht sein, somit verrutscht sie nicht
wartungsfreundlich und robust – eine Tasse Kaffe sollte sie abkönnen, sich ausklopfen lassen
die Tasten sollten durch Laser beschriftet sein, bzw lasergraviert.
Das bedeutet, daß die Beschriftung der Tasten nicht durch irgendwelche Folien beklebt ist, welche sich dann gerne lösen oder abrubbeln, oder einfach nur bedruckt sein – die Farbe geht garantiert auch bald ab, sondern die Beschriftung ist per Laser eingraviert. Nutzt sich also nie ab.
Guter Anschlag mit Feedback und prellungsfrei
der Anschlag um auszulösen sollte nicht zu stark und nicht zu schwach sein
die Tasten sollten eine fühlbare „Mulde“haben, für ein sicheres Schreibgefühl
Multimediatasten
Mal ehrlich, die meisten nutz man eh nicht, also nur das nötigste wie Laut-Leise-Stumm und evtl. noch Email und Browser.
Dafür umso wichtiger:
Eine Taste für den bequemen Standby-Modus für die Kaffepause, oder den Ruhezustand. Sollte aber so platziert sein, um gegen versehentliches Auslösen geschützt zu sein. Welche Funktion diese Schlaf-taste auslöst, kann man bequem in Windows in den Energie-Einstellungen in der Systemsteuerung festlegen.
Welche Tastatur ist nun die Beste (meiner Meinung nach)?
Mittlerweile (nach unzähligen Billig-Tastaturen, teueren ergonomischen Tastaturen, und auch einer Gaming-Tastatur schwöre ich auf die
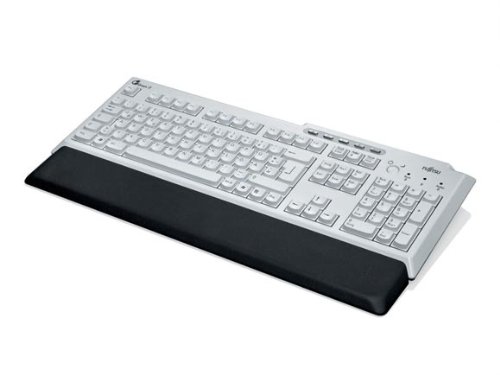
Fujitsu KBPC PX Tastatur!
Fujitsu KBPC PX ECO oder Fujitsu Siemens KBPC PX
Diese gibt es als Fujitsu KBPC PX ECO oder auch als Fujitsu Siemens KBPC PX.
Was bedeutet das ECO?
Nicht viel, denn bei dem ECO Modell spart man nicht etwa Strom (würde sich bei einer Tastatur auch kaum lohnen), sondern das ECO Modell bsteht einfach nur zu 40% aus Recycling-Kunststoff. Mehr nicht.
Ich habe beide Versionen getestet, sie sind komplett identisch, allerdings finde ich die Verarbeitung des „alten“ Modells ohne „ECO“ noch eine Spur wertiger.
Die Optimale Tastatur nur für Programmier und zum Schreiben?
Nein, auch Gamer oder „Zocker“ sind durchaus nicht anspruchslos in der Hardware Ihrer Wahl. Witzigerweise geht bei dieser Gruppe der Trend auch weg von sogenannten „Gaming“-Tastaturen – hin zu hochwertigen Standard Tastaturen. Einige Extrem-Zocker schwören immer noch angeblich auf eine uralte IBM-Tastatur.
Auch diese Gruppe wird auf jeden Fall mit der Fujitsu KBPC PX ECO oder Fujitsu Siemens KBPC PX glücklich!
Super Feature bei dieser Tastatur:
Es werden 2 Anschlusskabel mitgeliefert – 1x PS/2 und 1x USB!
Einfach das gewünschte Kabel hinten einclipsen.
Die Tastatur hat an extra Tasten „Home“ für den Browser, Email, lauter/leiser und stumm, diese funktionieren allerdings nur beim Betrieb über USB.
Sehr schön ist die versenkt angebrachte Taste für den Ruhemodus!
Ebenso mitgeliefert wird eine ansteckbare Handballenauflage.
Teilweise gibt es die Fujitsu KBPC PX auch im Set mit einer optischen USB Maus,
diese ist nicht etwa eine Billig-beigabe sondern Qualität von Logitech!
Qualität hat ihren Preis, die Fujitsu KBPC PX oder die bis auf das fragwürdige „ECO“ baugleiche Fujitsu Siemens KBPC PX liegen zwischen 40€ bis 80€.
Zu kaufen gibt es diese Super Tastatur unter anderem bei
Teilweise werden hier die Tastaturen relativ günstig angeboten, aber man weiß nie ob man auch das richtige Tastaturlayout bekommt. Ich selbst hatte dort eine Tastatur mit dem Zusatz QWERTZ – deutsches Layout – DE bestellt, bekommen habe ich eine mit tschechischem Layout!
Daher wohl auch der günstige Preis, die mussten wohl weg. Umtausch nach Deutsch bei Amazon Fehlanzeige. Nur Umtausch mit Geld zurück, und dann bitte nochmal bestellen, diesmal für knapp 80.-€ !!! Danke Amazon…
Weitere Informationen auf www.sparkasse-koelnbonn.de. Video Rating: 0 / 5
Private Pflegeversicherung als Absicherung für den Ernstfall
Die gesetzliche Pflegeversicherung wird über die Krankenkasse abgewickelt. Wer abhängig beschäftigt ist, muss ein Teil seines Gehalts an die gesetzliche Pflegeversicherung abgeben. Dabei zahlt die gesetzliche Pflegepflichtversicherung je nach … Read more on asentanews
Die gesetzliche Pflegeversicherung übernimmt die anfallenden Kosten einer Pflegebedürftigkeit nur zum Teil. Je nach Pflegebedürftigkeit des Betroffenen, könn… Video Rating: 5 / 5
Schon 400.000 Mal "Pflege-Bahr": Geförderte Pflegeversicherung ist ein …
Die vielgescholtene staatlich geförderte Pflegeversicherung entwickelt sich zum Verkaufschlager. Schon 400.000 Bürger haben den sogenannten "Pflege-Bahr" abgeschlossen, wie die Policen in Anlehnung an den früheren FDP-Gesundheitsminister Daniel … Read more on FOCUS Online
Anleitung zu unserem Vergleichsrechner für die private Pflegezusatzversicherung. Schnell und bequem die verschiedensten Angebote miteinander vergleichen. Ob …
http://www.ratgeberzentrale.de/senioren.html – Was passiert eigentlich, wenn eine allein stehende Person dement wird und nicht mehr weiß, dass sie eine priva… Video Rating: 0 / 5
Münchener Verein verbessert private Pflegeversicherung
Die Erweiterung der privaten Pflegeversicherung kann aus einem höheren Pflege-Tagegeld bestehen. Ebenso wurde eine nachträgliche Absicherung von Pflegestufen in die Versicherungsbedingungen aufgenommen, die beim ersten Vertragsabschluss … Read more on Arbeitskreis Krankenversicherungen


 Pattern or Song) or any Common Sample program from an ALL data file. Rather than save each Pattern individually to SmartMedia card – save an ALL file – this way it will not duplicate the COMMON samples for each individual Pattern save.